Painting Signum Games Miniatures With Quick Tips and Spooky Effects

miniature painting how to paint leather

Table of Contents

Painting Signum Games Miniatures: Assembly

Ever since I saw the Michelle Gazzini model in the Signum Games catalogue, I knew I wanted to paint it. What a fantastic pose, so suggestive of history but also necromantic menace! Despite the sheer range of miniatures available at their site, I was most attracted by a model that seems quite ‘mundane’ for being so human. This would be an interesting challenge, to make it a bit more fantastical. A good excuse for a spooky green glow effect, I thought to myself – seasonally appropriate, too, for Halloween.

Black primer + white primer sprayed directly from above = fast & easy!

First, I assembled the Signum Games model. Now, I am not a big fan of model construction, I lack the required patience and finesse, I think. Luckily this is a very easy kit to put together with minimal ‘clean up’ to do. There were a couple of mould lines but I used a model file to remove those easily. I may have missed a couple of smaller ones, but I always seem to do that. I am sure I am not the only one who finds them towards the end of painting! 

Pro Tip– you can always turn these magically-reappearing mould lines into seams or scars with a little texturing and painting trickery. I filled a gap on one of the arm joins with liquid putty. I much prefer liquid putty to ‘green stuff’ epoxy, as it has a user-friendly applicator nozzle for the toothpaste-like consistency of the putty, and an unbeatable smooth finish with no detracting impurities once cured. 

For the base, I added some scale-appropriate gravel. I like to put superglue on the base and then sprinkle bicarbonate of soda over the top. This sets instantly ready for painting, but is great for 28/32mm scale miniatures standing on stones/sand/snow due to the very fine grain nature of the bicarb.


"In less than two minutes, you too can be Caravaggio with a (spray) can!"

Lastly for this stage, I used two spray primers for a quick coverage and ‘Zenithal Prime’ effect. I sprayed black primer from the bottom, to simulate dark areas. I then sprayed a white primer angled above the hypodermic needle the Plague Doctor is holding up, as I wanted that to be the light source. In less than two minutes, you too can be Caravaggio with a (spray) can!

Painting Signum Games Miniatures: Base Coats

how to paint leather

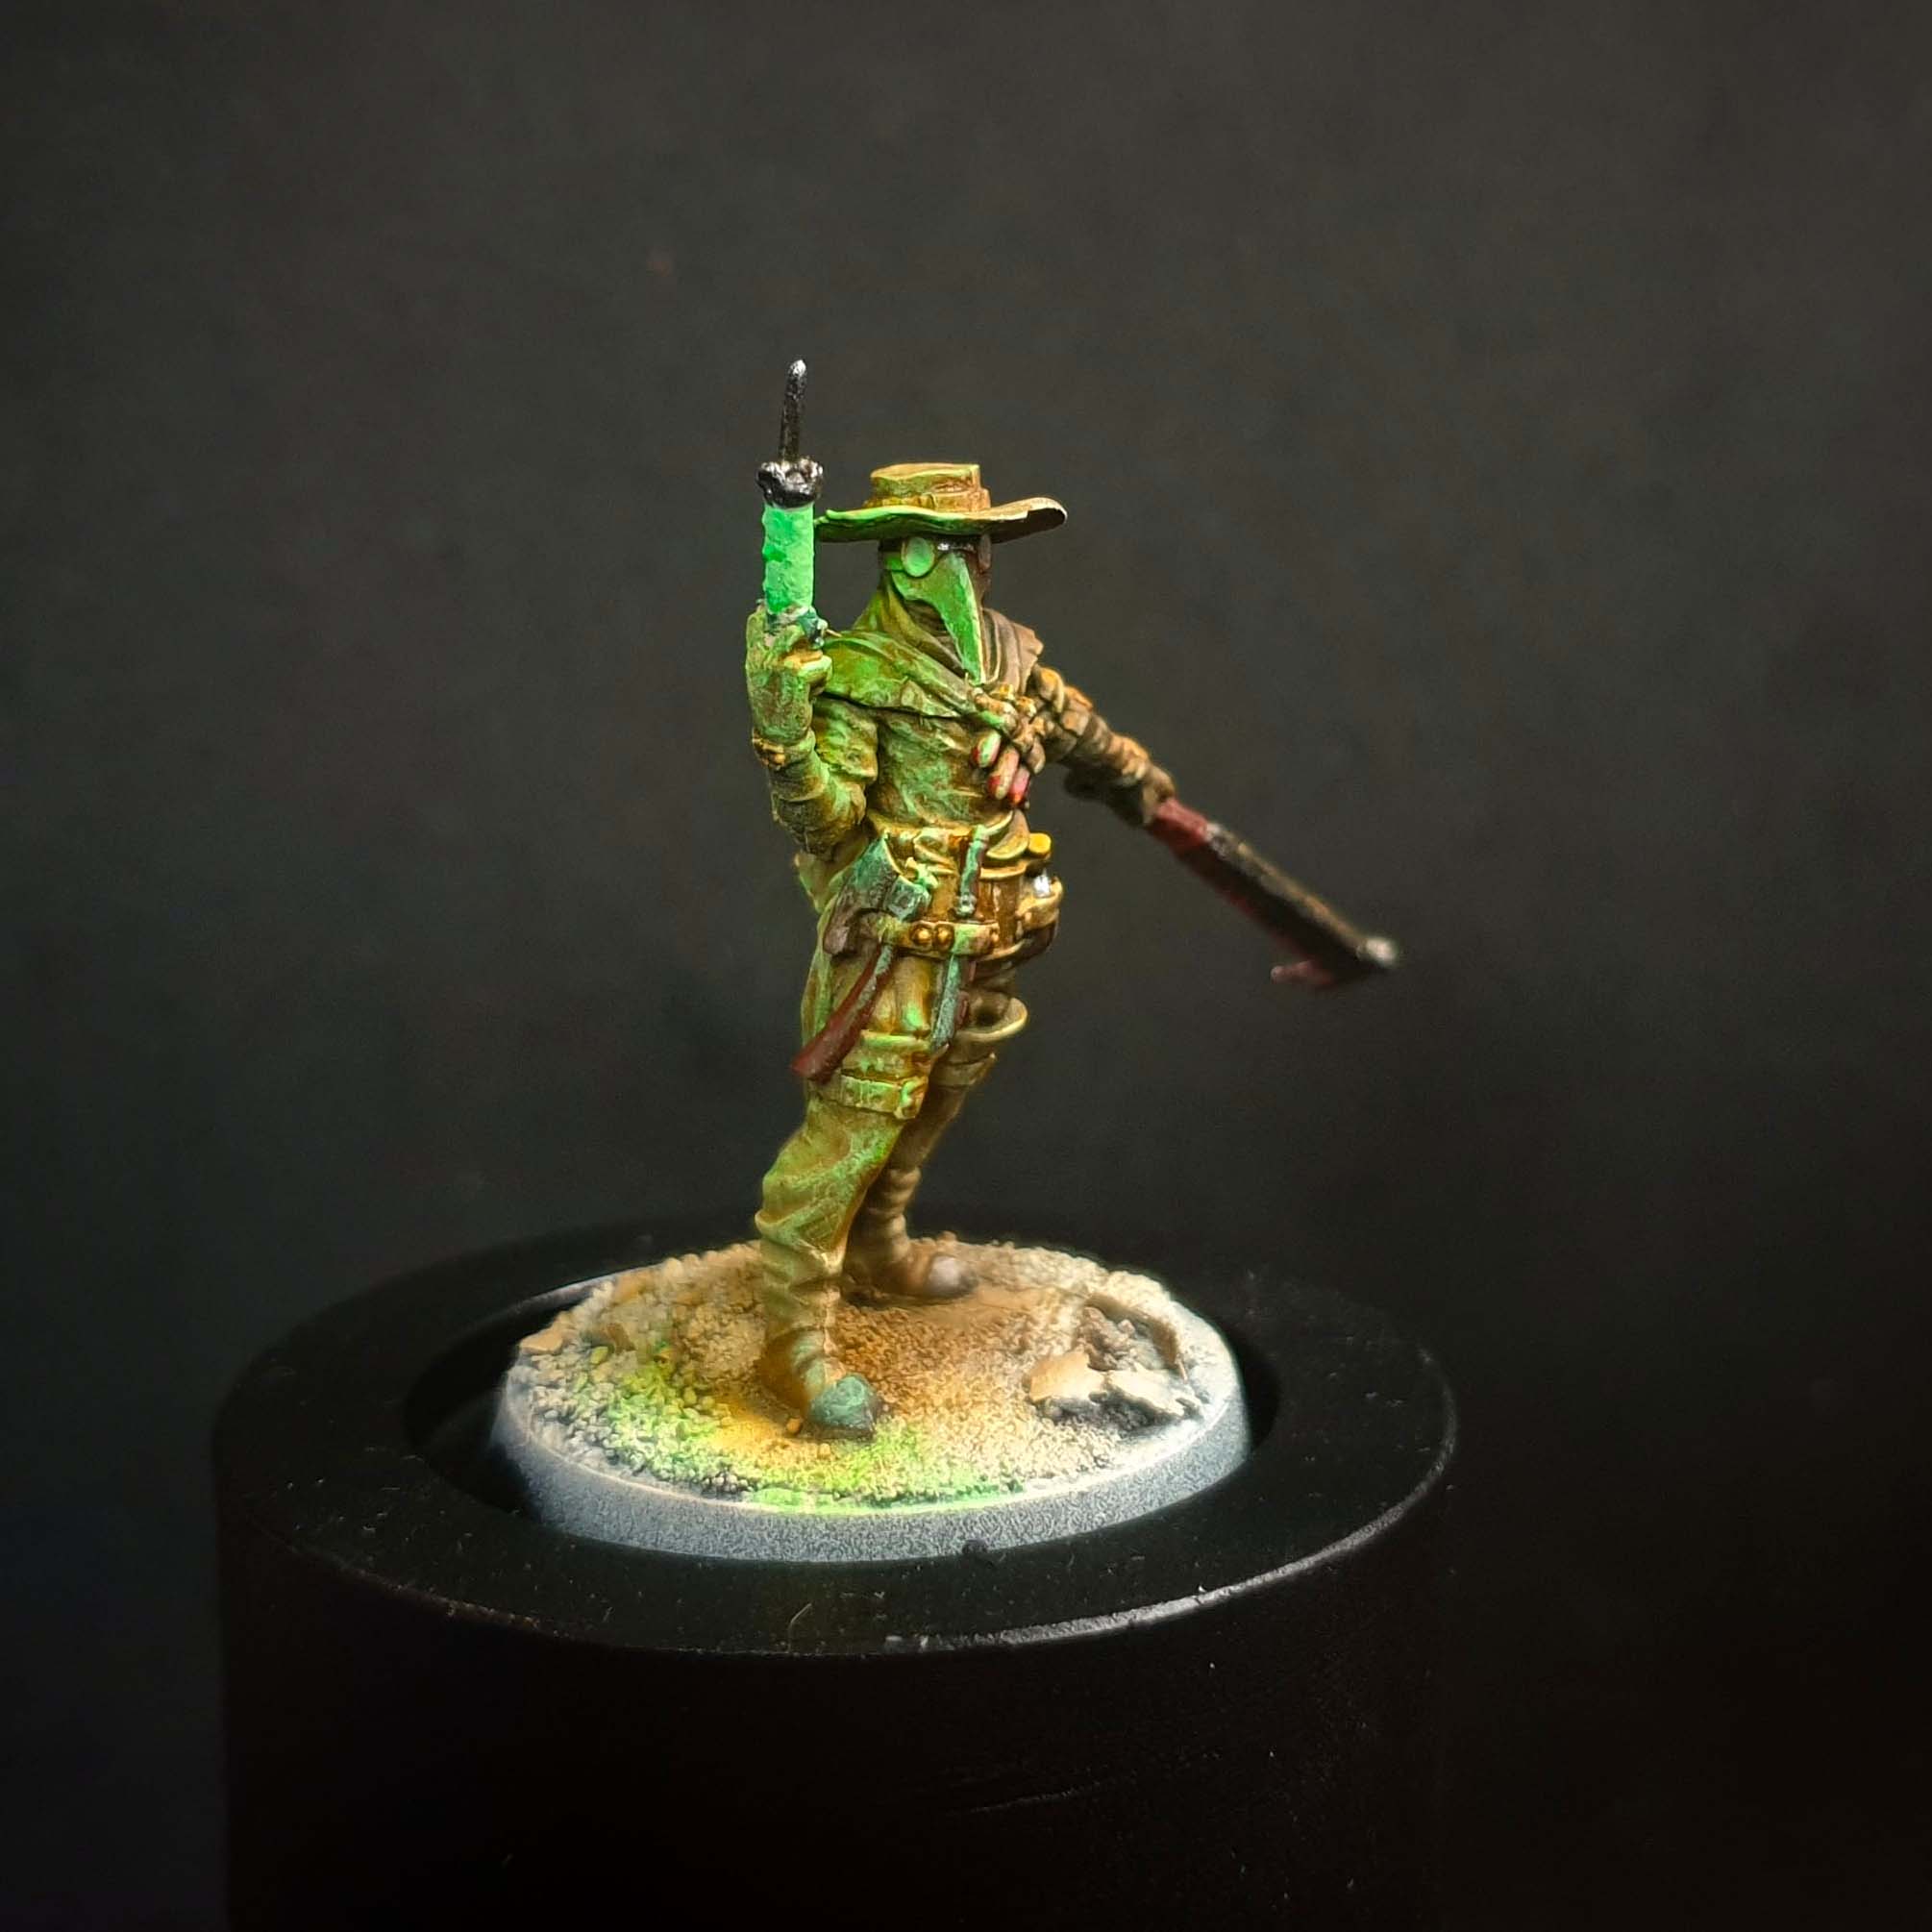
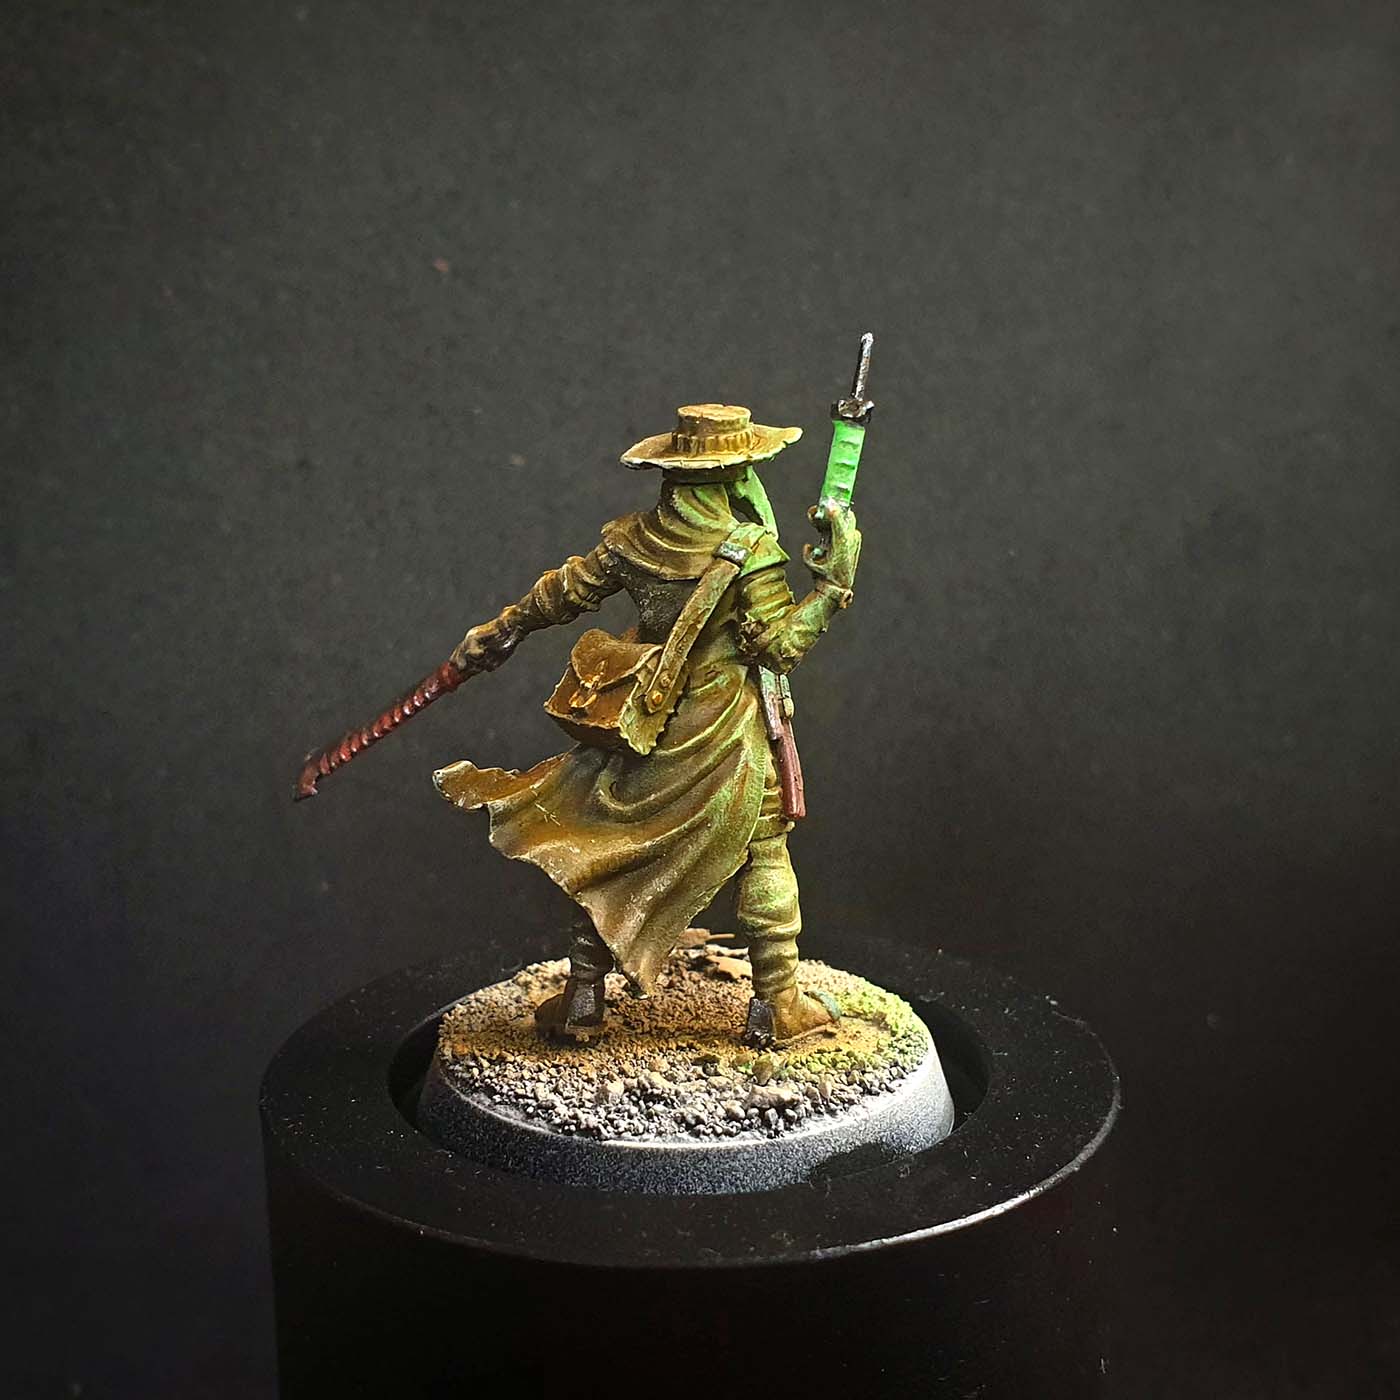
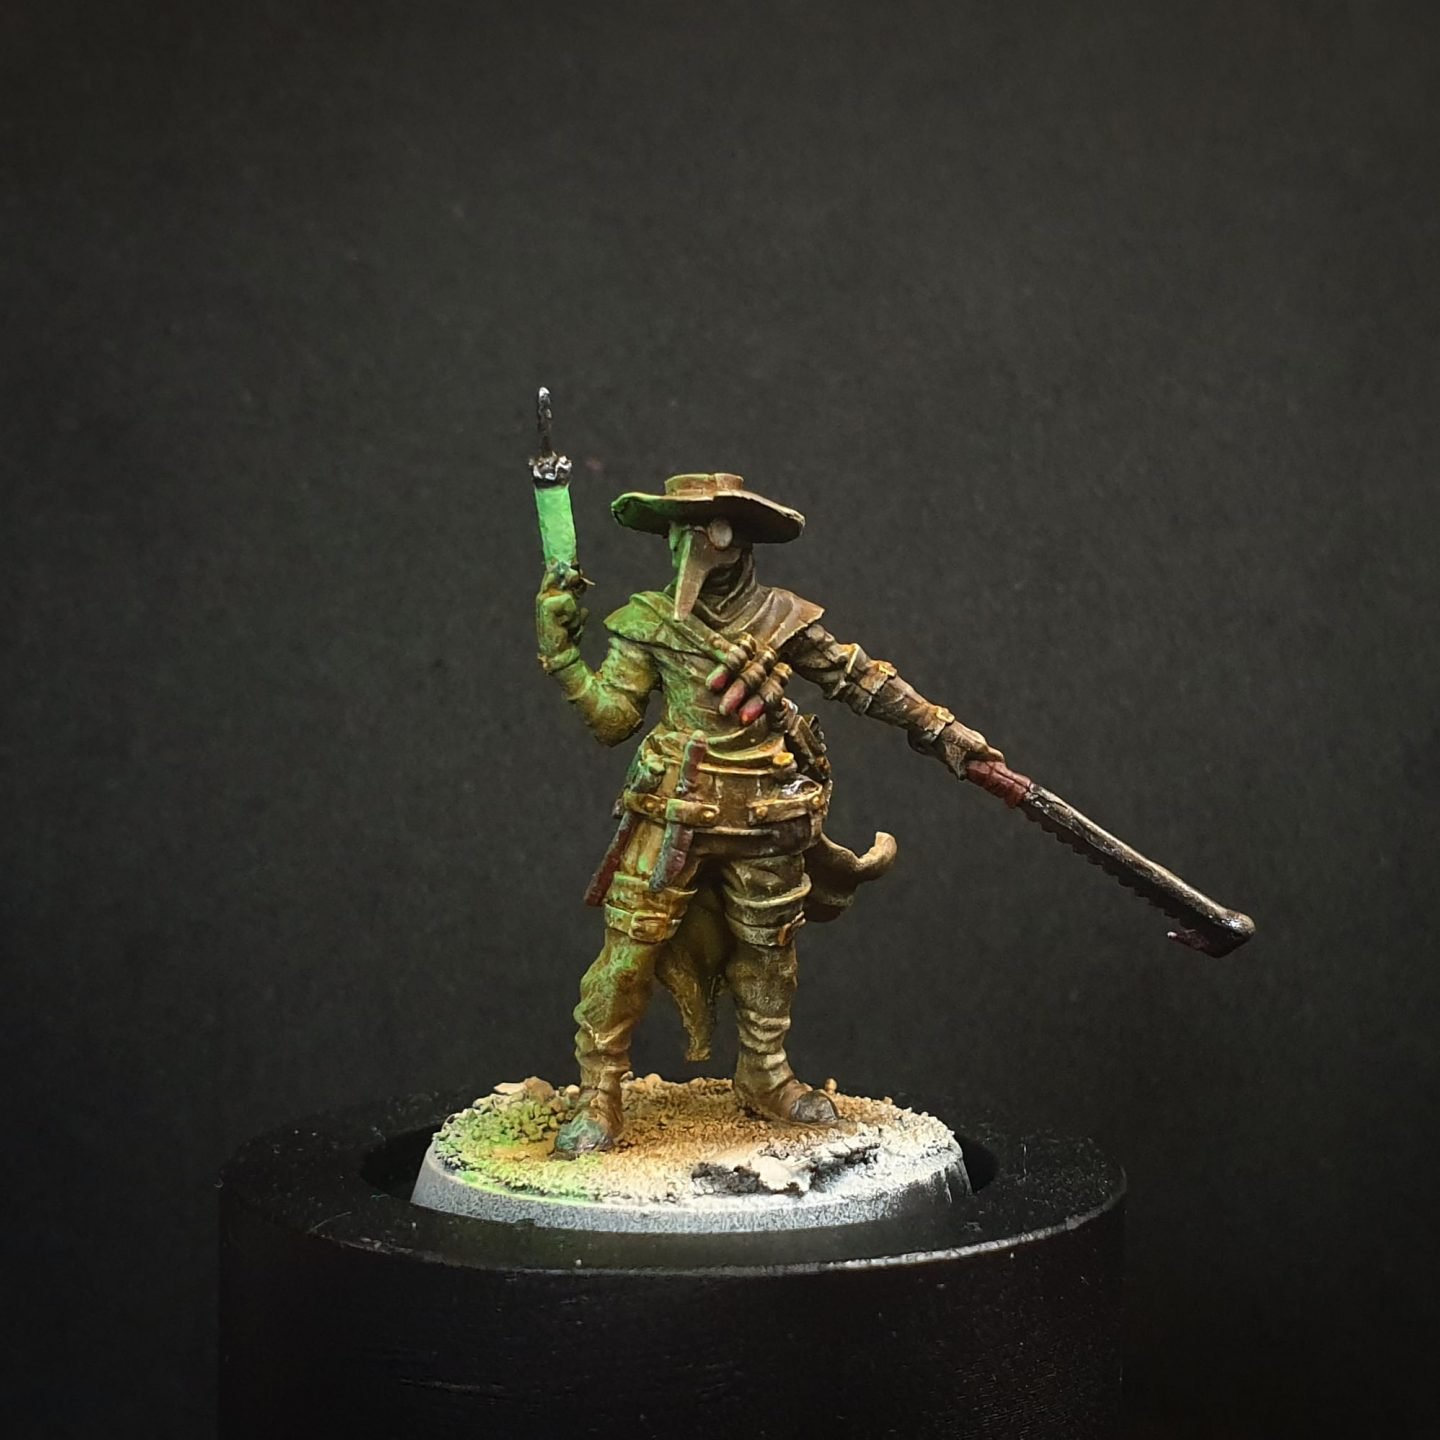
Caravaggio is appropriate, as he was known for his chiaroscuro, or in less artistic terms, how he played with light and dark. I love painting 'OSL' or Object Source Lighting, in my models. I would not say I am the best, but I have had a long fascination and I enjoy doing it a lot, and that is the most important thing. I knew for this piece that I wanted to do some appropriate yet spooky lighting effects, so I planned ahead with that in mind.

The beautiful thing about our hobby is that there are multiple discrete paths to success and no colour scheme should be absolutely applied, so feel free to express your creativity how you feel best- so feel free to paint a rainbow Plague Doctor!

Next, I painted the base colours. I wanted quick coverage, but appropriate to historical depictions of plague doctors. Google historical references here, it is a great idea for a source of inspiration, even if you aren’t a history buff like I am! Of course, the difficulty here is, if you don’t like 50 shades of medieval brown, your miniatures will come across as drab and uninteresting, like the muddy peasant aesthetic in Monty Python’s Holy Grail. The beautiful thing about our hobby is that there are multiple discrete paths to success and no colour scheme should be absolutely applied, so feel free to express your creativity how you feel best- so feel free to paint a rainbow Plague Doctor! 

I decided however, to use a horrifying green glow to help my miniature pop on the tabletop, and keep the strong nods to the historical plague doctor outfits from our own world history. They wore lots of heavy brown leather, well-worn and soaked in vinegar or ammonia, so I picked a ‘smoke’ quick-shade, tan quick-shade, and a pale yellow. The added advantage of this simple scheme is that the viewer’s focus will go to the green glow effect, which won’t be diminished by an overly-complex paint scheme surrounding it.

Plague Doctor basecoats and drybrush
Painting Signum Games miniatures is a joy- full of details like this Plague Doctor model!

Heavy washes, inks, quick-shades, or contrast paints all have speedy results over a zenithal prime underlayer, and I wanted to keep the values this priming technique had given me. I used the reusable membrane on my wet palette, and a Size 2 brush for this. The membrane is particularly good for this, as it has better moisture control than existing papers for wet palettes, so I can use inks and wash paints on it without worrying that they will dilute when I don’t want them to. The smoke paint I used for leather areas and for the shadows. I used the tan for areas where the white primer simulated cast light as the lighter colour would be very helpful later with the green glow effect.

Finally for this stage, I used a drybrush to apply the pale yellow highlight on edges and raised areas. Drybrushing is quick and effective for achieving a textured leather, and pale yellow is your friend- it is a universal highlight colour so can be practically used on almost any colour for a quick and effective job that doesn’t desaturate like white paints do. Thanks, pale yellow!

Painting Signum Games Miniatures: Details

Plague Doctor Detailing
Adding visual interest when painting Signum Games miniatures is easy.

A model in one colour, even with shadows and highlights, will run the risk of looking flat, and I really wanted to avoid that. But it was the challenge I knew I was letting myself in for! I decided to focus in on details that can be painted quickly and effectively in differing colours to help break up the blocks of brown. I added visual interest by using silver and gold metallic paints on some details, such as buckles and strap studs.

 I painted blade handles with a warm red-brown for a variety to the leathers on display, and the glass vials on the chest with a dark red, so they looked like blood samples. Red is opposite green on the colour wheel, and contrast is a great way to help add interest to a model, arguably THE way. Cool vs Warm colours, Light vs Dark – if you look at a model and worry it is ‘boring’, consider adding a spot of contrasting colour.

...if you look at a model and worry it is 'boring', consider adding a spot of contrasting colour

For the needle, I used white ink but mixed with flow improver, in a 50/50 mix. The Fluorescent Green I was using for the liquid work best over a light base colour. White ink is hard to beat for an intense and consistent white base, but is hard to control if you aren’t using an airbrush to apply it. Using ink with flow improver helps a lot with brush control, as I did here. 

Once dry, I applied the Fluo Green over the top, and glazed it into the surrounding model areas. I love glazing, I find it very therapeutic in how methodical it can be, but I appreciate it is quite dull and difficult to some. We all like different stages of the hobby process, don’t we! As it turned out here, however, the green light effect was almost instant! Fluo paints have a high pigmentation and thiness that is perfect for glazing, I have found. I used a Size 00 brush for this stage.

3D printed miniature paint

Painting Signum Games Miniatures: Push the Contrast

I glazed the flourescent green colour repeatedly with several, very thin layers. The closer it was to the glowing green liquid in the needle, the more layers I applied so that it had a higher concentration and intensity. The original leather colours underneath should be harder to discern, but further away it weakens to be just a ‘tint’. Because this helps simulate how light diffuses over an area in real life it will look great on your miniature.

Painting Signum Games Miniatures
The completed Plague Doctor miniature from Signum Games.

With ‘Object Source Lighting’ techniques,  I think it is really important to show how the light is affecting the surrounding environment. I didn’t glaze the green onto the left side of the model or base for instance, because the light would not affect there; the body of the plague doctor would block the light and instead create an area of shadow. These considerations are easy to forget, but oh-so effective if you employ them! A good idea is to use a flashlight to see where shadows are created on a model or diorama. 

Alternatively you can take a photo and use black & white and high contrast filters on photo editors like Instagram, to work out your light and shadow placements. Again, Googling images for reference materials can be a great inspiration. Just because the reference material is not from a miniature, *does not* mean you cannot use it to inform your miniature!

Painting Signum Games Miniatures

With 'Object Source Lighting' techniques,  I think it is really important to show how the light is affecting the surrounding environment.

On the green liquid in the needle, I added more fluo green but mixed with the pale yellow from earlier. This helps improve the intensity whilst retaining the saturation. For that reason I always advise people that ask me, to avoid using pure whites for highlights, and I would advise you now to invest in a good pale yellow as a replacement for using white in your highlights. Finally, for metallic parts and blades, I did an edge highlight using a very bright silver metallic paint on the most extreme ‘sharp’ edges, and my Size 00 brush

For the bone saw, I also used a red wash to look like old, dried blood stains. Whether historical or fantastical, I doubt such doctors had much time to clean their blades to a high-shine. And anway, mask-wearing, blade-toting models at Halloween probably should have red on them!

Painting Signum Games Miniatures: The Finished Piece!

signum games 3D print mini

To achieve this, use these Redgrass Painting tools!