Edge Highlight Space Marine

rgg tutorial edge highlight space marine guide salamander primaris warhammer 40k games workshop redgrassgames angle of approach and side of brush for best edge highlights

Edge highlight space marine tutorial. If you paint a lot of ‘Eavy Metal style Games Workshop models, you’re familiar with edge highlights. And, as mentioned before, space marine highlights don’t have to be avoided. However, edge highlighting can be tricky. And if you are painting space marines, you will be painting a lot of them! But with brush trickery, we can avoid the worst of it. So, read on!

Table of Contents

Edge Highlight Space Marine: GETTING STARTED

edge highlight space marine guide salamander primaris warhammer 40k games workshop redgrassgames priming stage zenithal prime
Zenithal prime time.

First, I assembled the mini. I used plastic cement, and scraped off any sprue marks with a craft knife. Be careful when doing this, and move the blade away from you! You can also use your nippers or a dedicated tool for this work. As this was a space marine from the Salamander chapter, I used a hand flamer and hammer for the weapons. Very appropriate for Nocturne!  Next comes the priming stage!

PRIMING STAGE

edge highlight space marine guide salamander primaris warhammer 40k games workshop redgrassgames priming stage zenithal prime
Zenithal prime time.

So for the priming stage I used the technique ‘Zenithal Priming.’ I spray primed the model with a black primer, and then directly from above I sprayed an off-white. With little time and effort I had all the volumes and lightfalls on the model.

Of course you can airbrush prime, or use brush priming, whatever you are most comfortable with. I just prefer the speed of spray priming and minimal set up/clean up. If you brush prime, I would recommend using a brush with a good tip and belly like the RGG Size 2.

WHAT DO I WANT TO ACHIEVE WITH THIS MINIATURE?

second close up edge highlight space marine guide salamander primaris warhammer 40k games workshop redgrassgames angle of approach and side of brush for best edge highlights

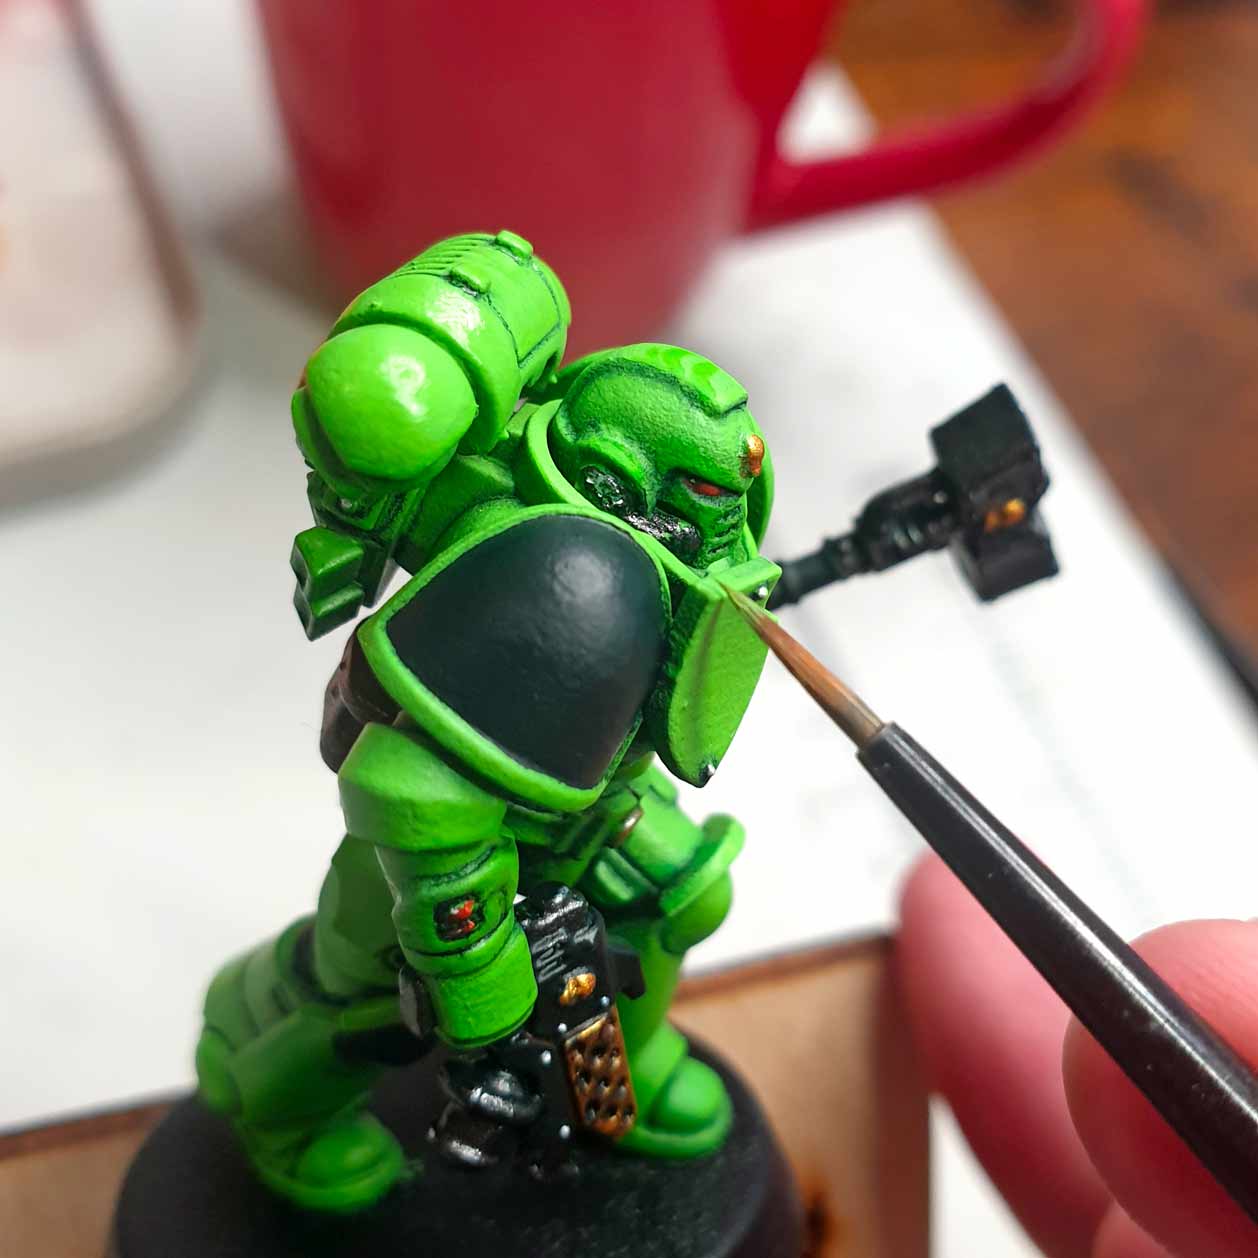
Before you even think about color schemes, it is good to think about end goals. Here I aim to paint edge highlights consistently and to a good standard. I want to emulate the 'Eavy Metal style of GW, but have manageable goals! It takes time and patience to hone edge highlighting of that standard. This is also a good time to hone working with certain tools and techniques.

Edge Highlight Space Marine: Armor

edge highlight space marine guide salamander primaris warhammer 40k games workshop redgrassgames basecoat green armor stage rgg painting guide
How lurid!

Next, I painted the armor a vibrant green. With bold colors like this, having the white underneath really helps the intensity.

Certain colors are easier to edge highlight than others, particularly dark colors. Dark Angels green would be easier than Salamanders, for instance. But, we didn’t pick this to be easy! Rather than light greens here, then, we will aim for pale yellows to edge highlight.

I find the RGG size 2 brush is a solid ‘workhorse’ brush for most paintjobs. It can basecoat, wash, or layer! That is because it has a big belly that can hold lots of paint, but also a fine tip for precision work. And a Redgrass Games wet palette is invaluable to keep that acrylic paint workable whilst out of the pot! I always recommend not painting straight from the pot as the paint needs thinning and mixing. This will be especially true of the edge highlighting stage later.

BASECOATS & RECESS SHADES

edge highlight space marine guide salamander primaris warhammer 40k games workshop redgrassgames basecoats and recess shade stage rgg painting guide how to
...Much bettter for some color variety and some recess shades!

Such a vivid green needs breaking up a little. Especially across whole squads it could run the risk of looking cartoonish. Hardly just for a proud son of Vulcan! So it is helpful to block in the other features. I chose a charcoal black for pauldrons and weapon cases. I also used gold for the skulls and aquila. Similarly I used red on the helmet and brown for the leathers. For fine details like the lenses, I used the Redgrass size 00, as I wanted more control. It is a really useful brush for fine precision work. As we shall see in a moment when we edge highlight!

Before highlights, however, we need that contrast. A key component to making edge highlights work is recess shades. Placing them as close together as possible for maximum contrast is ideal for that ‘pop’! In all the recesses I ran a blue-black wash. This added depth and definition to all that flat green armor.

...A key component to making edge highlights work is recess shades. Placing them as close together as possible for maximum contrast is ideal for that 'pop'!

Edge Highlight Space Marine: EDGE HIGHLIGHTS

rgg tutorial edge highlight space marine guide salamander primaris warhammer 40k games workshop redgrassgames angle of approach and side of brush for best edge highlights
Use the side of the brush, approach the edge at an angle, and use thinned paint for best results when edge highlighting.

This armor has lots of panels and sharp edges ideal for edge highlights. I used my RGG 00 brush for such fine details. Where possible, I want the edge highlights to be stark, thin, and consistent. Using the same quality brush throughout the process will certainly help here. Especially if you ‘know’ the particular brush very well. Like a fountain pen, a good brush over time will change slowly, and it is helpful to be aware of its idiosyncrasies or limitations. Low-quality brushes that split or fray quickly are not recommended for edge highlighting.

The angle of approach – or angle of attack (!) – also helps. Edge highlighting is much easier and more controlled if you use the brush in a glancing fashion. That is, not trying to use the tip to apply the paint to the surface, but rather the side. This is easier shown rather than written, so I have included some close-up action images to illustrate what I mean here. Following the edge with the brush at a 45 degree angle gives all the consistency and control of the side of the brush head.

Lastly for good edge highlights, paint consistency is vital. Thinned paint is better for control and smoothness, but it still needs to be opaque enough for that stark ‘pop!’ we want. Using my Redgrassgames wet palette here is invaluable. I can control the consistency and keep it stable on the palette surface indefinitely. I only added a little water to the mix, and the wet palette stops it getting overly-diluted.

Finishing Details

Finally are some key details that also need highlights. It is not just the green armor that needs that ‘Eavy Metal edge highlight treatment, after all! Doing all the edges is very time consuming, but it is undeniably effective for that ‘pop’ we seek! Using the same methods and advice as above, I also highlighted the weapons and black panels. Don’t forget, consistency and control are key for edge highlighting! This is far easier with a good brush and wet palette-controlled paints. I distressed the brown leather with some scratchy, tan, highlights.

For the red helmet lenses, I did small white dot at the back and an orange dot at the front. This suggests a 3D, reflective surface. Gloss varnish would also work here. The black parts of the armor I highlighted with a pale blue-gray on all the highest points and sharp corners. For the purity seal, I highlighted the parchment with an off-white, and the red wax with some orange.

edge highlight space marine guide salamander primaris warhammer 40k games workshop redgrassgames finished edge highlights rgg how to painting guide

"Don't forget, consistency and control are key for edge highlighting! This is far easier with a good brush and wet palette-controlled paints."

Edge Highlight Space Marine: COMPLETED PIECE!

completed model space marine guide salamander primaris warhammer 40k games workshop redgrassgames angle of approach and side of brush for best edge highlights
Its hammer time!

Ready to deliver the Emperor’s justice, with hammer and flame! A Salamander space marine ready for war. Hopefully from this guide you can tackle edge highlights more easily. If you are wondering how I added the freehand details, go next to our article on the website! – James.

James is using the following RedgrassGames Painting tools

Wet palettes, brushes...