Paint Your Minis Fast
Paint Your Minis Fast. In this tutorial we are painting a ‘Republic of Polonia Mech Walker’ from the ‘Scythe’ boardgame . Unpainted boardgame miniatures can be quite detracting when you play. However, there are usually so many its hard to know how to make a dent in all that unpainted plastic! The small scale can also be a challenge, even for experienced painters, to get the most out of the sculpts. However, and especially for beginner painters, using the core mini painting techniques still helps! Follow our guide for some tips, and master boardgame minis every time. Once you’re done, try our other articles, too.
Table of Contents
Paint Your Minis Fast: GETTING STARTED
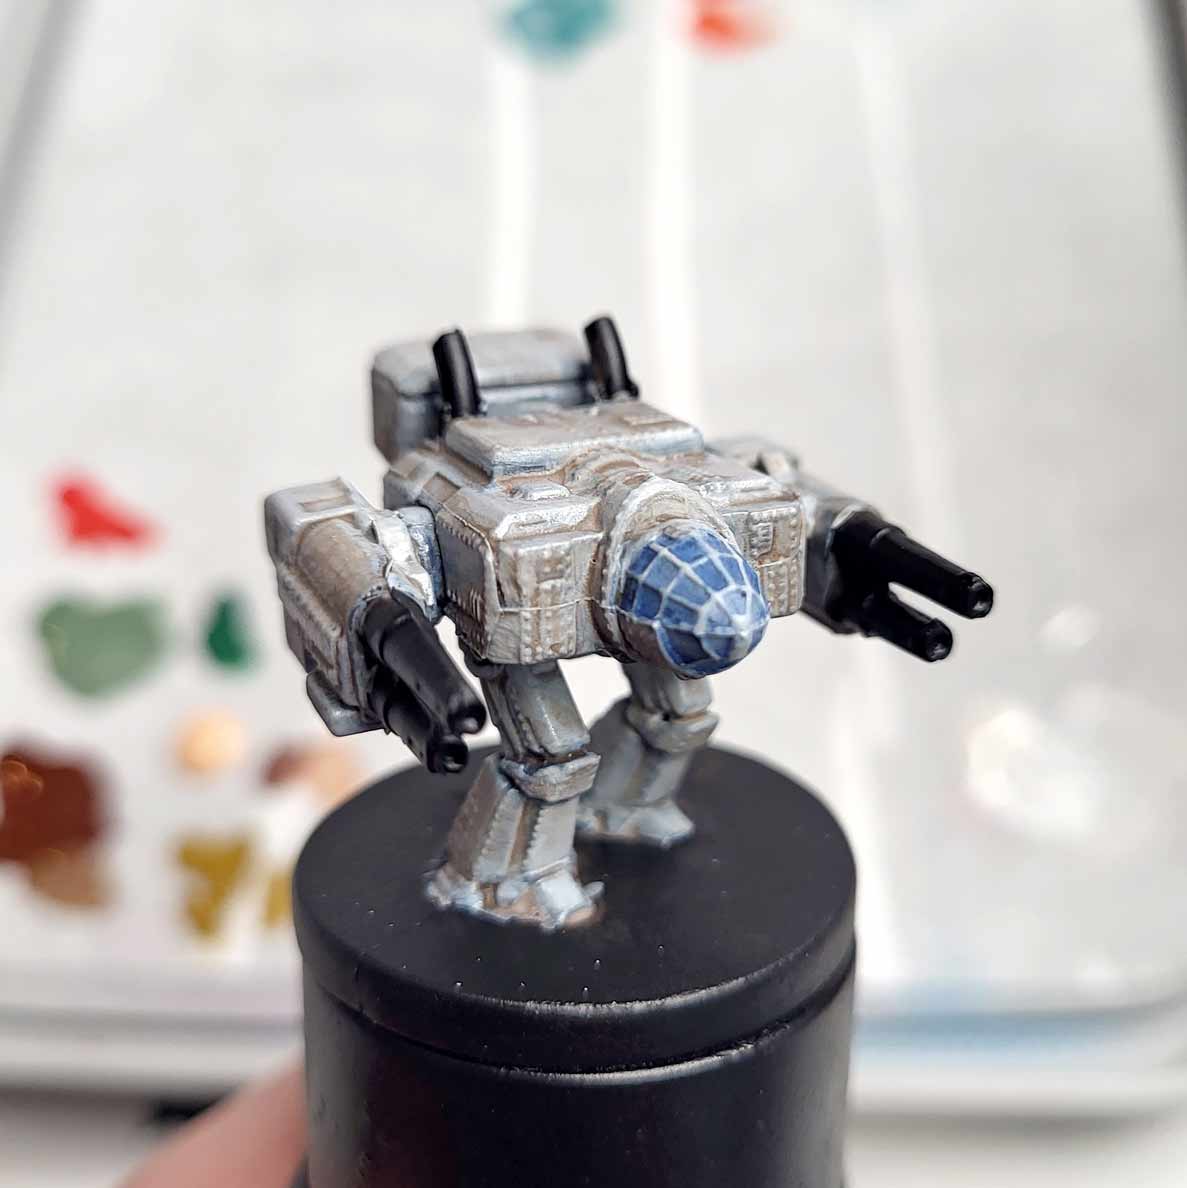
Step one was easy, no assembly required for this boardgame mini! This is more common with boardgame pieces, rather than painting models or wargame figurines. Which is great, because if you’re like me, you’re not great at the construction phase, so now you can speed onto miniature painting! My RGG360 painting handle came in handy to hold the mech walker during the painting session. This is good because if you handle the model lots, the oils on your hands, or just repetitive rubbing, can chip off the paint you are applying.
Priming 101
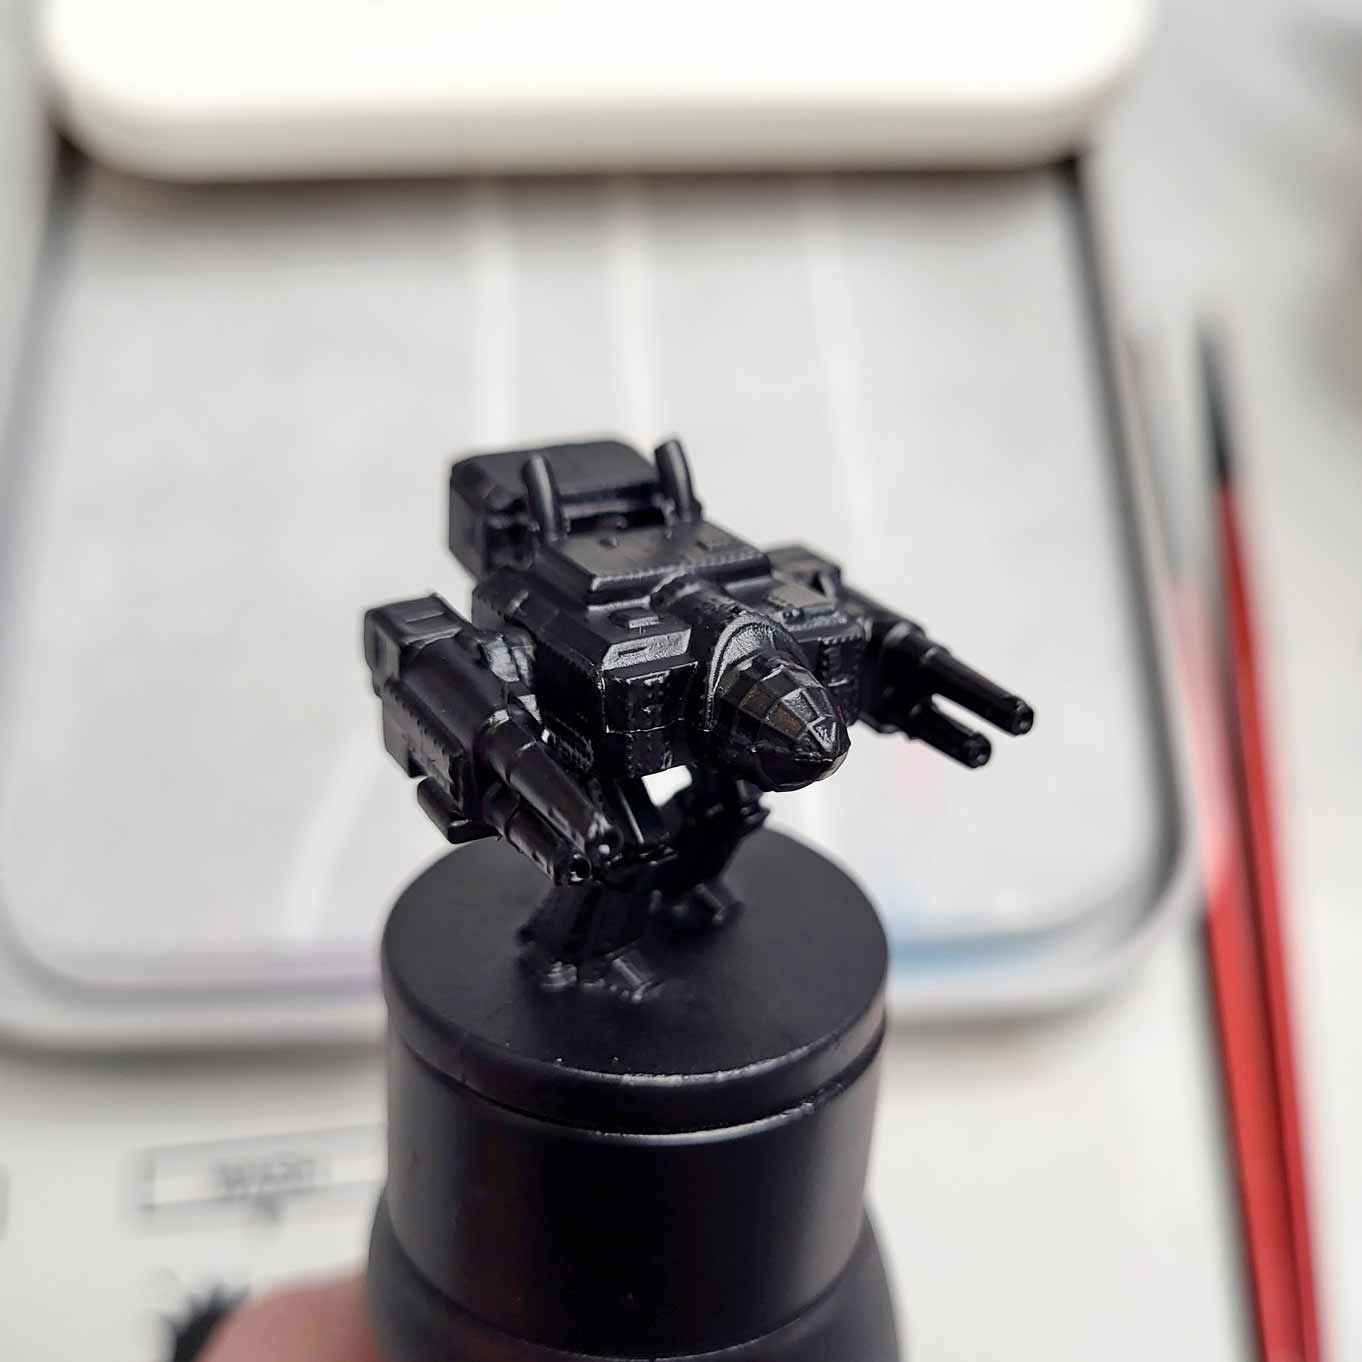
Next, I primed the model. A good priming layer should be thin, but helps your subsequent acrylic layers adhere better to the model. I did a black primer here but experiment as there are a variety available. If you are doing a predominantly green or blue scheme for your mechs, for instance, save yourself time by spray priming in the appropriate green or blue! Personally wherever possible I like to use ‘rattle can’ or aerosol primers as they are quick and easy. They give a thin, consistent coverage which is ideal. Just be sure to spray in a well-ventilated area, and that it is not too cold or too wet. If you do prime by brush, try to keep the layers thin, and use a brush like the RGG Size 2 as it has a big belly and covers more model faster. You don’t want to get tired painting the priming coat! Despite all the small details on this model, I actually managed most of this paintjob with the RGG Size 2; its just that versatile!
WHAT DO I WANT TO ACHIEVE WITH THIS MINIATURE?
Always begin by mentally plotting out how things will go. 'What do I want to get from this experience?' Painting is not just a physical experience. There may be multiple considerations. But there should always be an end-goal (e.g. battle ready), and also a technical area you wish to hone. For me on this project, I wanted a game-ready piece. It would need to be replicable over multiple similar mech boardgame pieces, but should be easy for beginner painters to replicate too.
Paint Your Minis Fast: Thin Base Layers!
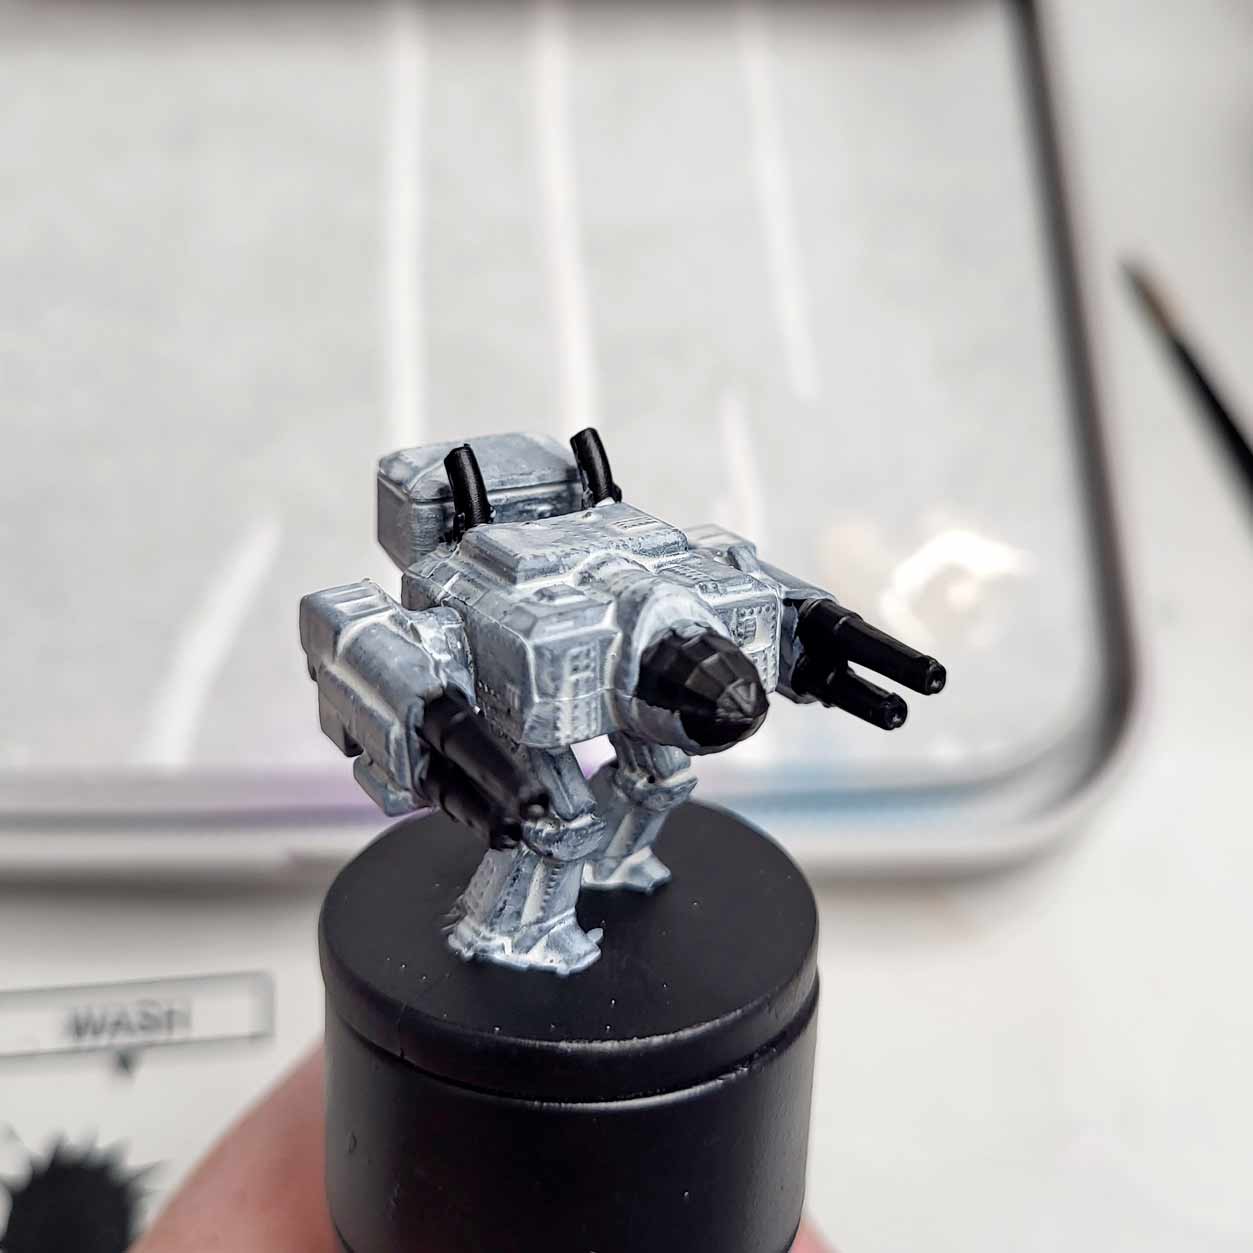
Pale colors are tricky to apply as they often have an inconsistent, chalky finish and/or lumpy. Generally, paler pigments tend to be larger. However, we can negate the worst of this by thinning and diluting our paints properly. Patience also helps! Here, I had to apply a few thin coats of the pale basecolor in order to get a desirable finish. It means looking at ugly layers whilst they dry and reapplying them until it is smooth. As you can see with the first image especially, that first layer of pale gray over the black primer doesn’t look great! But, persevere. On such a small scale model with such delicate detailing, building up our coats is far preferable to one thick coat which will obscure everything and look lumpy.
A Redgrass Games wet palette is also incredibly helpful, regardless of your relative skill level. It helps keep that acrylic paint workable longer whilst out of the pot! I always recommend not painting straight from the pot as the paint needs thinning and mixing. That is especially useful here as we move from darker reds to eventually hot oranges for the wing tips. We can blend old and new colors together on the palette for better color transitions without having to try and fail on the model itself.
Use Washes!
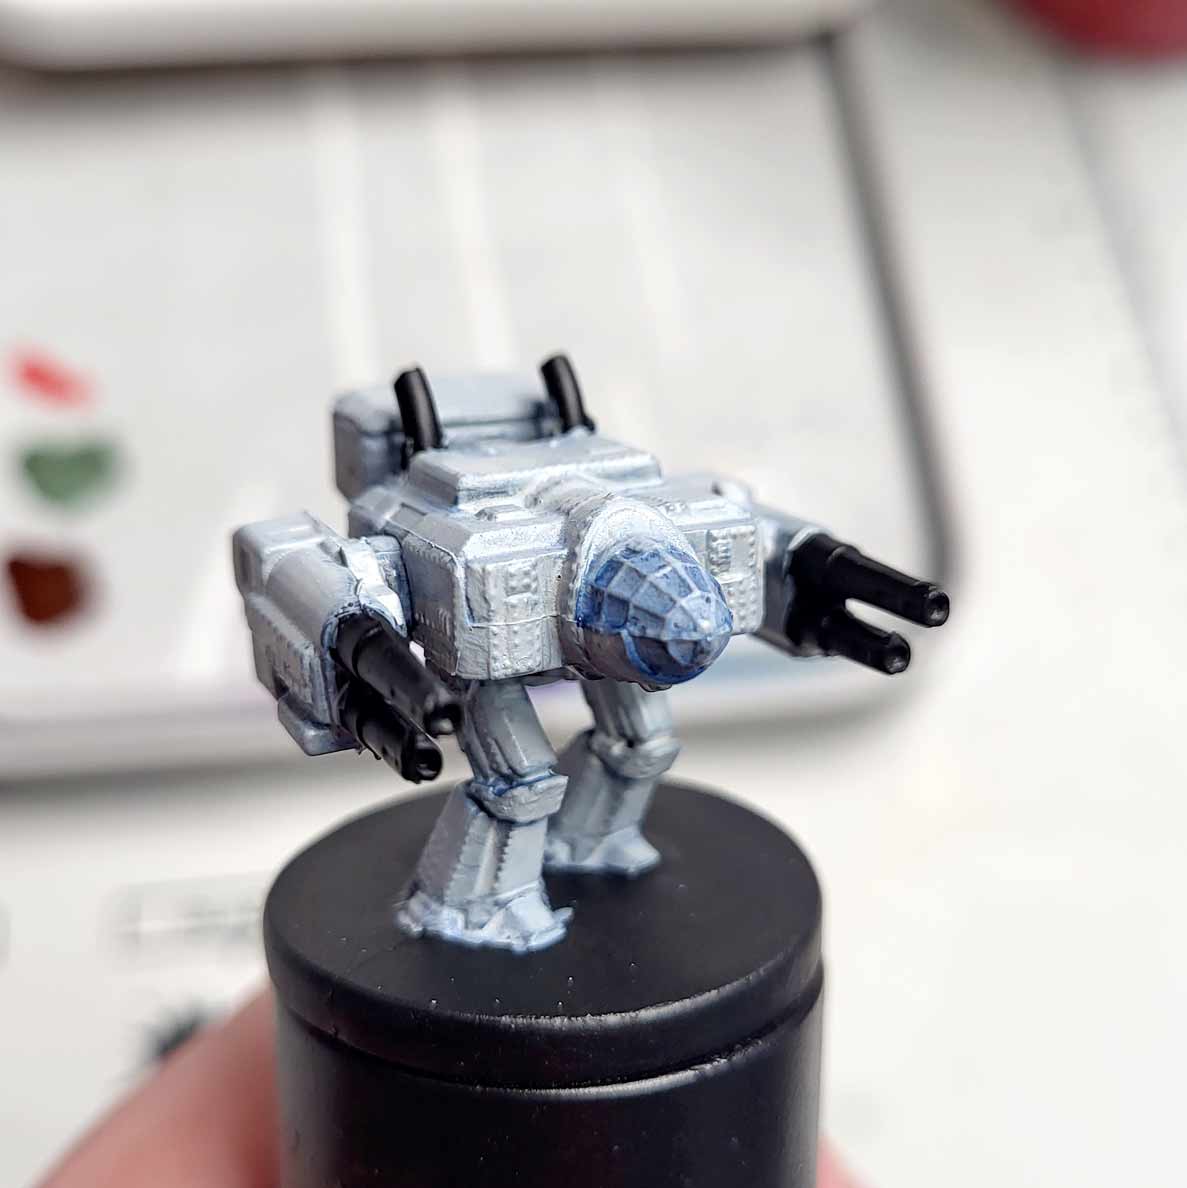
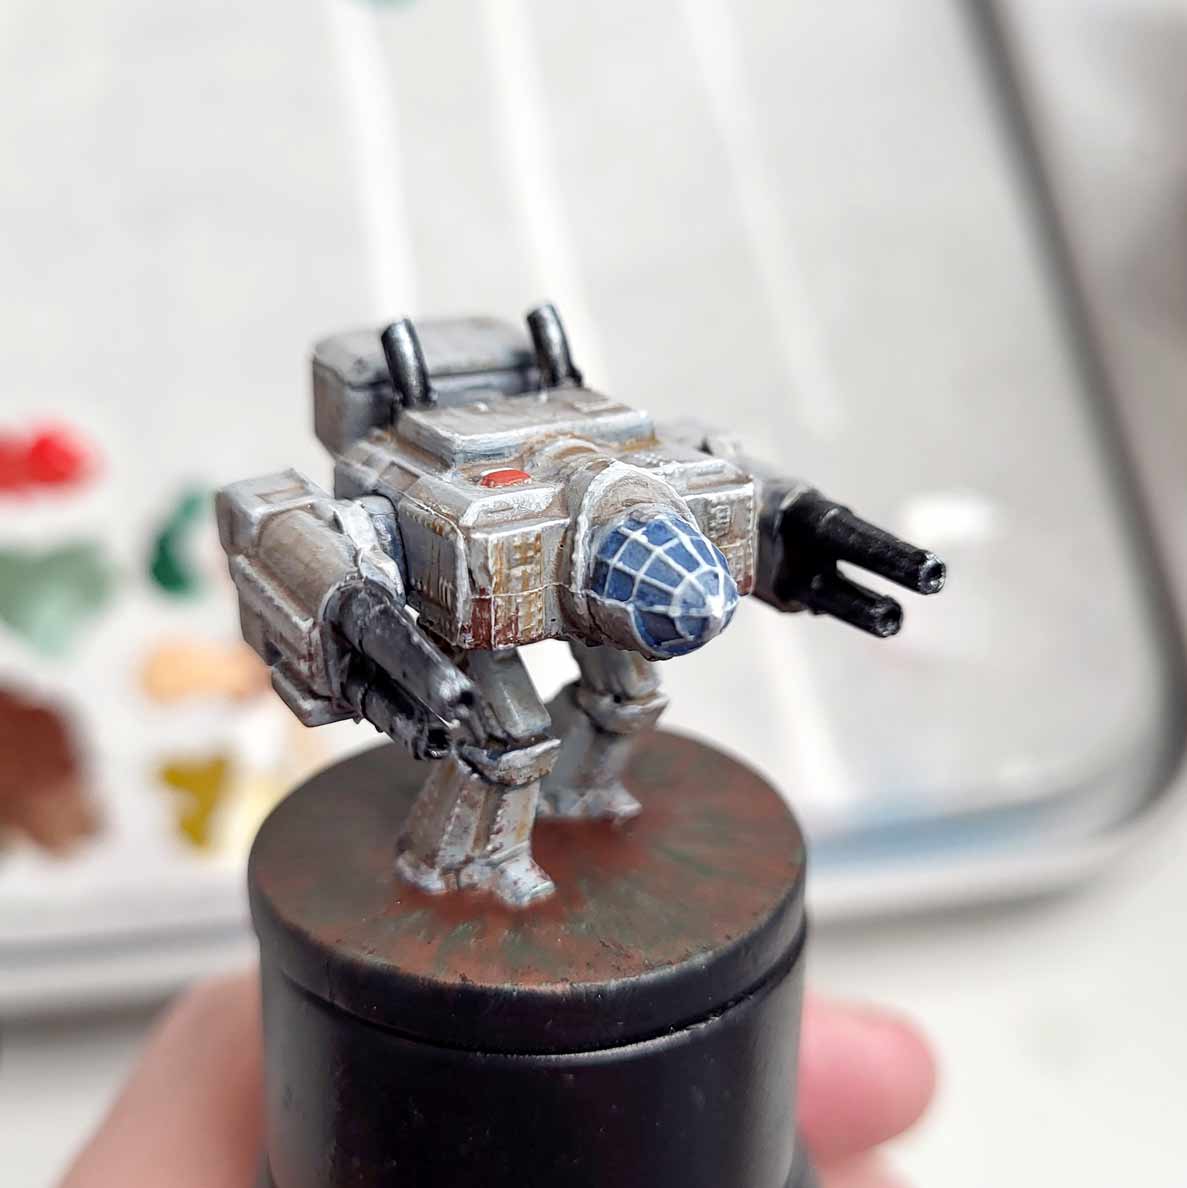
Washes and shade paints give us easy shadows and definition, When used correctly, they settle in recesses and panel lines, and can help smooth transitions by ‘glazing’ two areas together. I used washes here because it is such a small model with too-easy-to-obscure details. It helps give an effective ‘pop’ to the model faster, and runs into the recesses for you saving you time. You can I initially added a blue rinse over everything to give it a cool metallic feel, followed by more brown washes to suggest realistic age and weathering. I also made the cockpit glass effect by just applying successive layers of blue wash. And it took barely any skill! You do have to be patient with drying times, though. Let it fully dry, and for best effects, apply two or so thinned layers of your chosen wash. Pre-mixes or homemade washes work just as well here, though it is easier to change the consistency of washes you make from normal paints on your wet palette.
...Pre-mixes or homemade washes work just as well here, though it is easier to change the consistency of washes you make from normal paints on your wet palette.
Paint Your Minis Fast: Highlights & Weathering
After we make shadows, we also need to make highlights. Here it also helps key yet small scale details stand out on any boardgame battlefield from a distance! For these mech walkers, we also want easy yet realistic weathering effects. It adds visual interest by breaking up all the armor panels and suggests ‘story’ to the model.
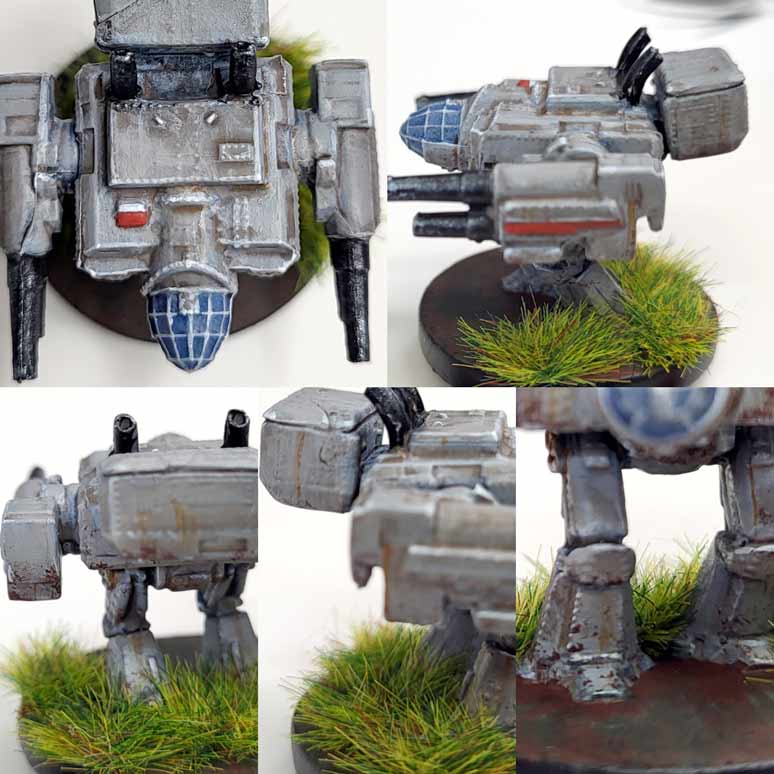
I edge highlighted the mech armor, which thanks to all the sharp angles, was easy enough. For good edge highlighting, remember to angle your brush approach toward the edge you wish to highlight- the more acute, the thinner the edge will be. Thin your paint but only a little, so it flows easily and consistently from your brush strokes onto the edge in question. Finally, apply the highlight with the side of the brush, rather than the tip. For the weathering, I ‘streaked’ vertical lines of thinned red-brown and orange using my 00 brush. This looks like rust and oil stains. I also applied dark brown ‘chips’ to the legs with a piece of packing foam. For such small and fiddly spaces, I would suggest using a pair of tweezers to hold the foam and then dab it onto edges like the leg armor panels.
Finishing Details
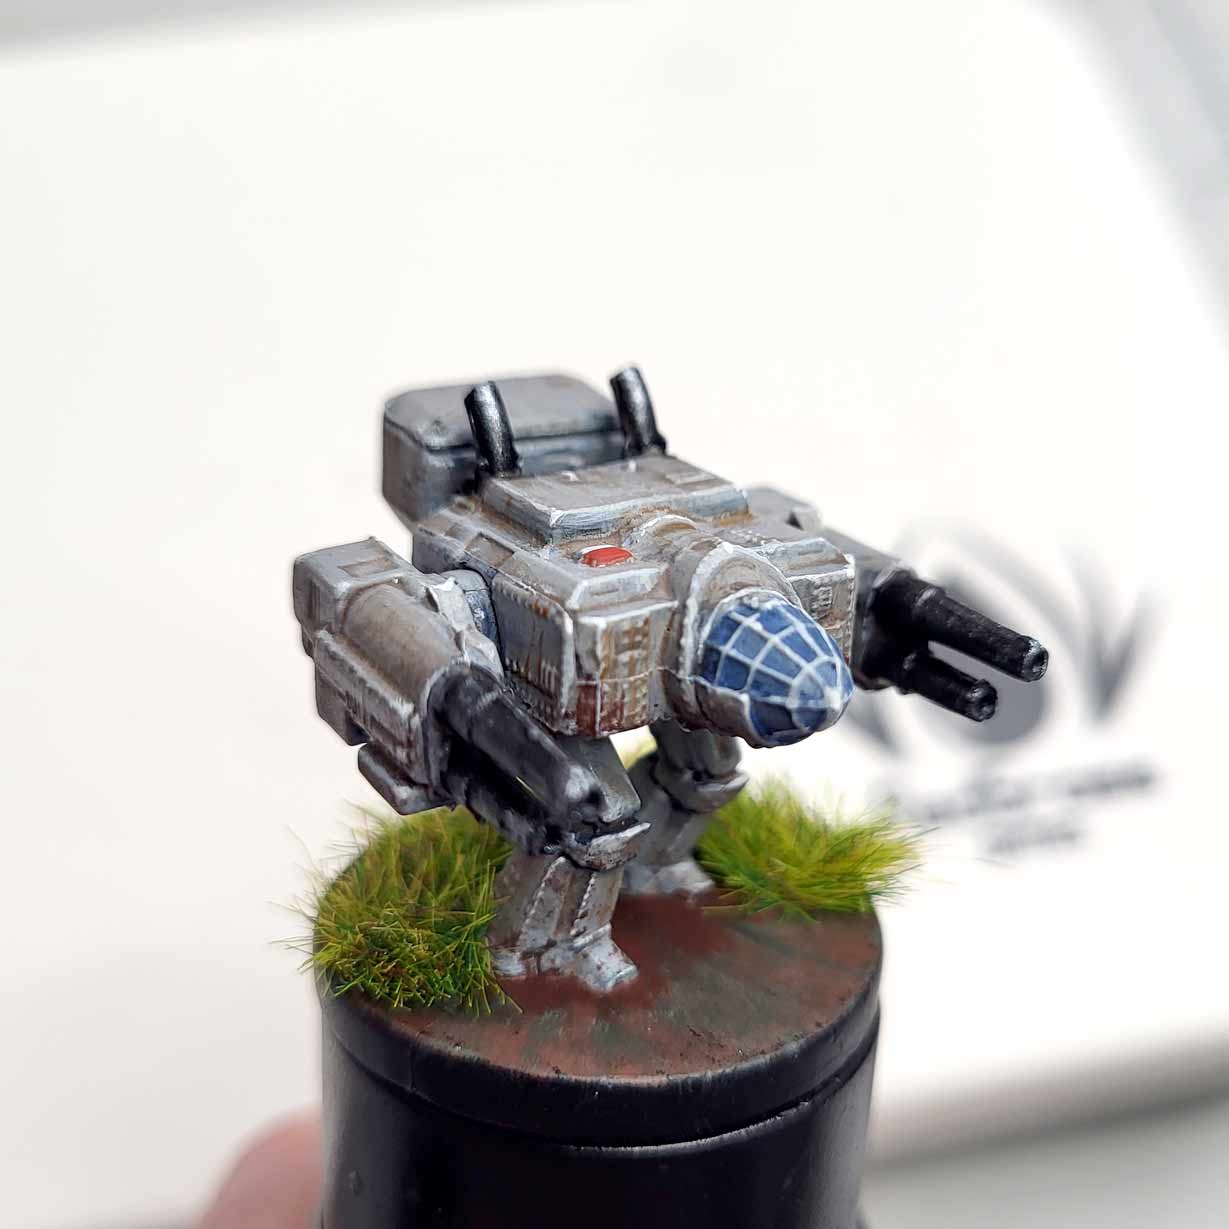
Lastly is the key details that help finish the piece. I used my 00 for all the sharpest edge highlights or spot highlights. For example I used a small dot of pure white for the sharpest edges of the armor panels for extra definition and pop. Also I based the model using premade grass tufts to help situate the model and because it suits the Scythe aesthetic. Simple! As you can see I also added some optional markings on the mech- the red/white colors of Polonia on the side and top of the walker. This adds a bit more visual interest but also I felt in-game they could be like spotter markings used by overhead aircraft for identification and similar.
...Also I based the model using premade grass tufts to help situate the model and because it suits the Scythe aesthetic. Simple!
James
Paint Your Minis Fast: COMPLETED PIECE!
And there you go! A Republic of Polonia mech walker ready to conquer their enemies on the gaming board! Hopefully you can see these methods are easy to replicate as well as being effective, so you can ‘slay the gray’ in your boardgame box quickly. – James.
James is using the following RedgrassGames Painting tools
Wet palettes, brushes...