
Introduction
Greetings! In this guide we are looking at how to tackle painting yellow. Specifically, how to paint an Imperial Fist space marine from Warhammer 40,000. Yellow is a very challenging color, as it is hard to highlight. After all, it is already a highlight! It is also hard to get smooth, consistent coats of yellow. But with a few tips and tricks you can paint easy and effective yellow miniatures. So read on!
Table of Contents
PAINTING YELLOW MINIATURES: GETTING STARTED

Starting at the beginning, I followed the assembling guide from the kit, and used plastic cement to glue pieces. I also filed away some mould lines and drilled the gun barrel. These are optional stages that give cosmetic benefits, but if you have an army to build will impact on your speediness. I affixed the model to a base, and then primed the model. To help ensure bold primary colors like yellow I suggest priming in gray or even better, white. If you prime with black you will find it will take more coats of yellow to ensure a smooth and opaque coverage. You can of course prime and basecoat your models with a brush, and if you do I would recommend one with a large belly and a good tip like the RGG brush size 2.
Undercoating 101

As mentioned previously, yellow can be a hard color to deal with. Hard to highlight, hard to shade. I decided to experiment with some underpainting here, to help add depth and modulation to the yellow armor. I sprayed some pink from below the model, hitting all the shadow areas. Red would also work, as would magenta. Once I applied the yellow basecoat for the armor, this would provide a nice gradient and more tonal variation. For it to work properly, it would be a good idea to use a vibrant pre-shade, and a translucent basecolor. If you have inks for instance, you could try a yellow ink for this. I could have gone for a stronger pre-shade, but for a first experiment I am satisfied it works!
WHAT DO I WANT TO ACHIEVE WITH THIS MINIATURE?

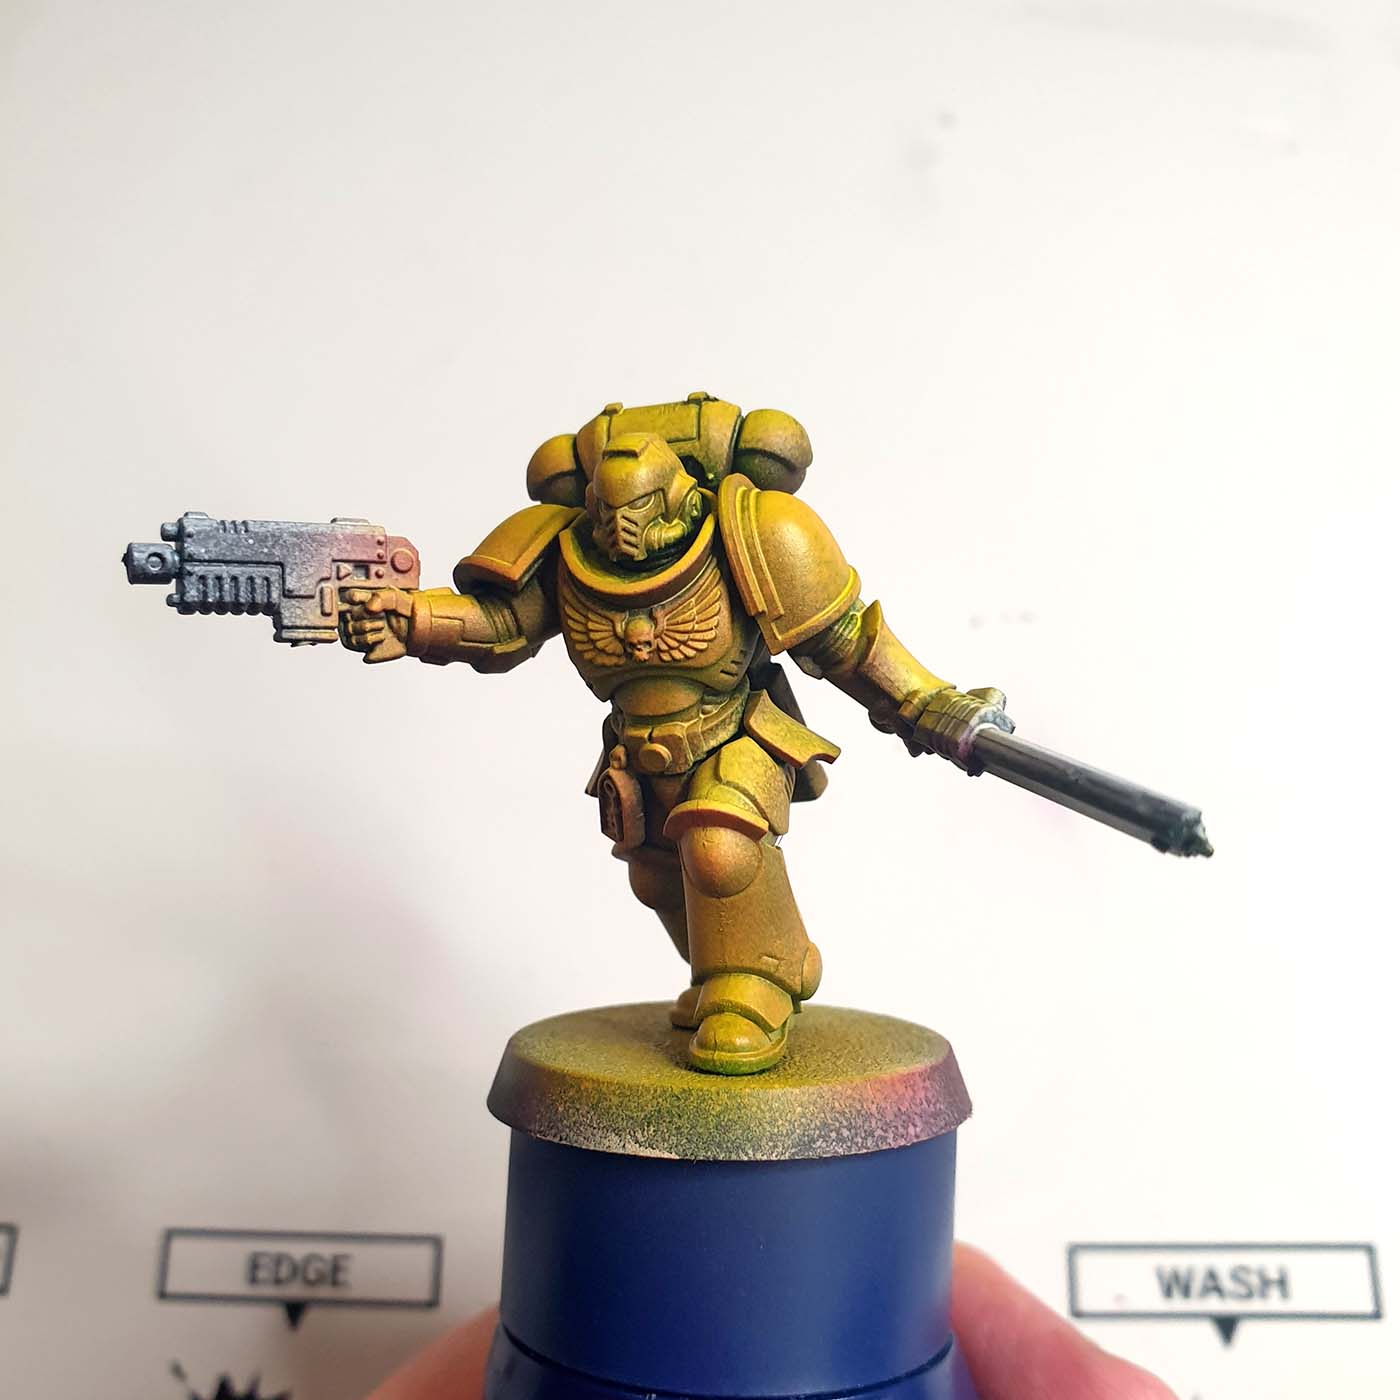
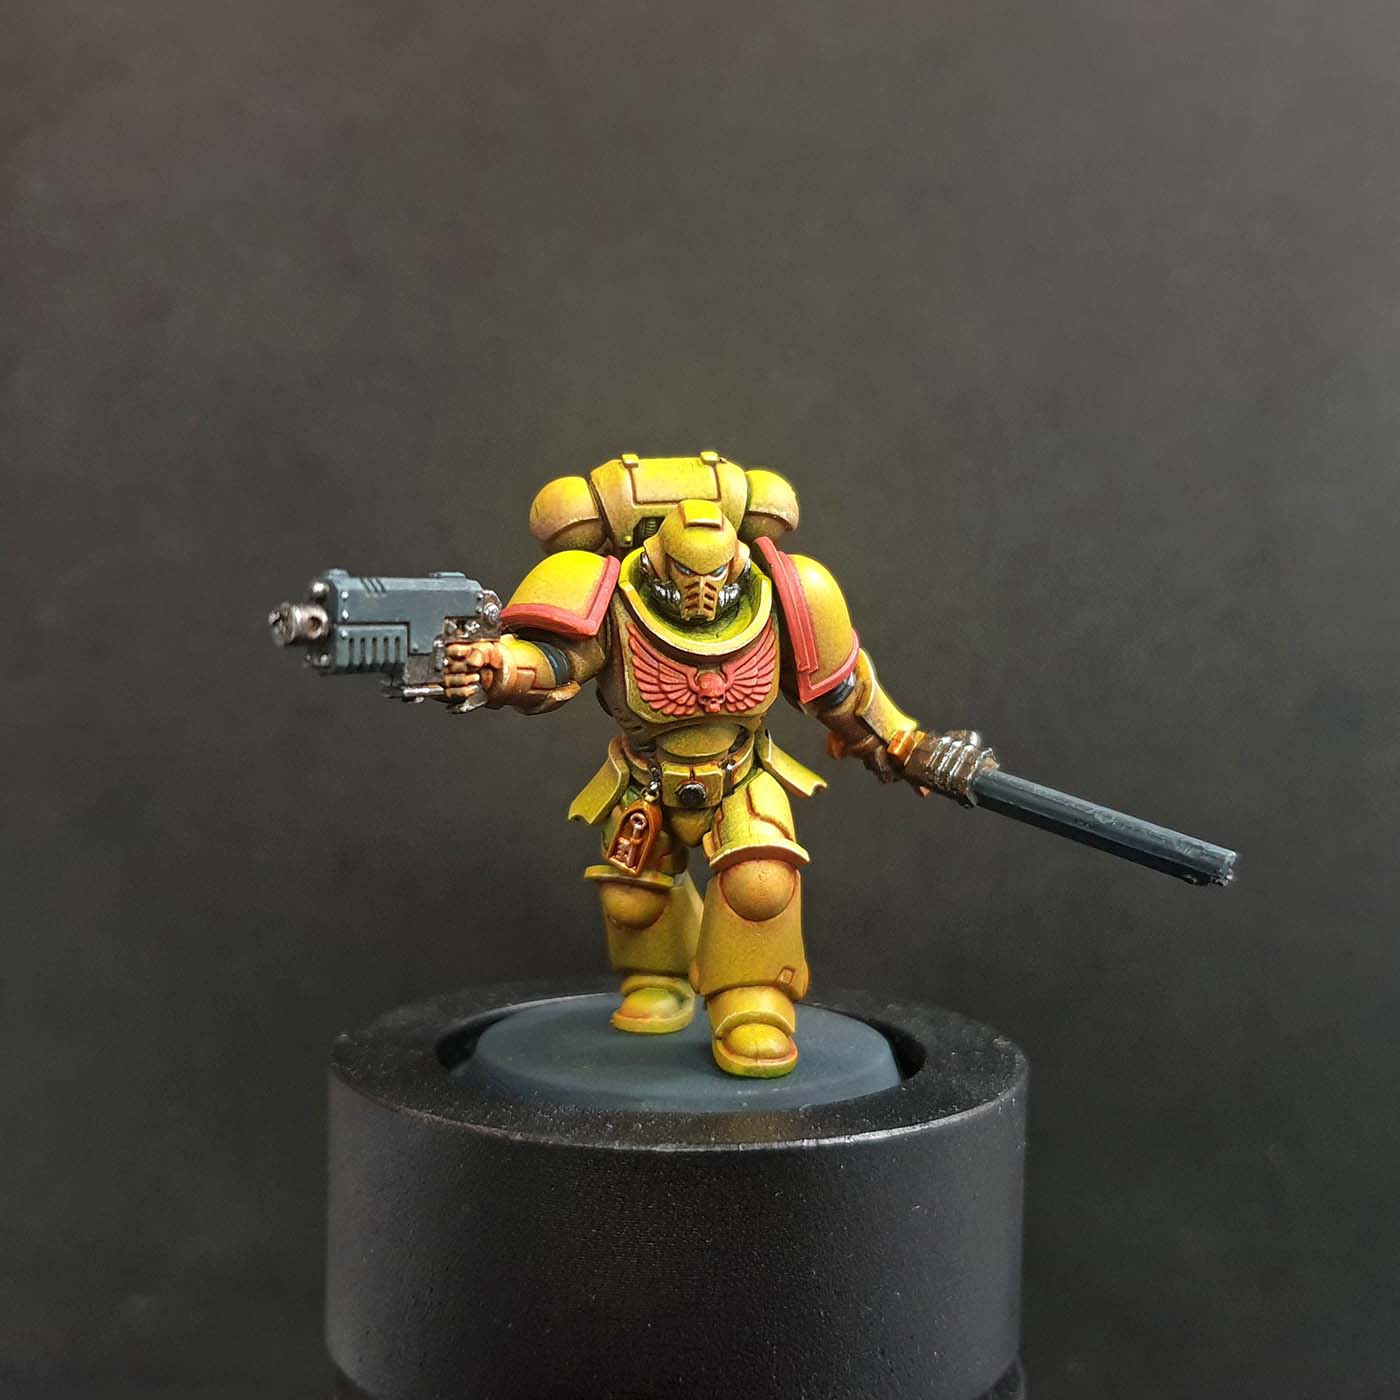
Why are we painting? The philosophy behind our paintjobs, and having an achievable endgoal are important. If you are looking for how to paint yellow armor, there is a strong chance you are army painting. Perhaps too you have been unsuccessful with yellow before. So our goal with this tutorial is to find effective and simple ways to paint yellow that can be replicated across many models. The simpler the process the better, as more steps & complex techniques add a greater risk of burnout.
The visual focus of an Imperial Fist space marine will undoubtedly be the yellow! That will draw the viewer’s eye, so it is important we focus on that and get it right. As with any color scheme were one (primary) color dominates, it is also good to have visual interest and contrast. We can break up all that yellow with key details. After some online research, I saw the 3rd Company uses red trims and aquilas. ‘The Sentinels of Terra’ then could offer a good scheme for me here.
PAINTING YELLOW MINIATURES: ARMOR

Next it was time for the yellow layer. The key here is to use really thin coats. You may need to apply a few layers, letting each dry fully before going over the top again. A wet palette will help you thin and preserve your paint mixes as you layer. If you have a good yellow spray, or use a yellow ink through an airbrush, that helps. The pink pre-shade has created a subtle gradient which is really great, I feel. Though with future models I would like to ‘amp up’ that contrast even more! The shadow areas have a warmer almost orange yellow, whereas the highest areas are purer yellow. Once I was satisfied I was sure to protect this layer with a coat of clear varnish. This will stop it chipping, but will also make the oil stage even easier!
BLOCKING IN BASECOATS

Once I was satisfied with the yellow armor, it was time to ‘block in’ the other base colors. I used an off-black for the armor joints and weapon cases, as this is easier to shade and highlight. The helmet lenses I painted with turquoise for a striking ‘pop’ of color. The relic case I painted gold, but otherwise the other exposed metal paints were painted with a dark steel. The pauldron trims and the chestplate aquila I based with a dark red.
There are not a lot of colors beside yellow in this scheme, as we are thinking about army painting expediency. The colors we have chosen however are bold and go well against all that yellow. For all the fiddly parts I used the Redgrass size 00, as it gave me lots of control. On his back he has an ammo pouch and holster, which I based in a red-brown to simulate leather.
There are not a lot of colors beside yellow in this scheme, as we are thinking about army painting expediency. The colors we have chosen however are bold and go well against all that yellow.
James
PAINTING YELLOW MINIATURES: USING OILS!

Oil paints are great to add to the repetoire of a miniature painter. They have been prized for centuries for their rich pigments and slow drying times. Slow drying times means mistakes can get corrected and blending transitions is easy! When used in conjunction with acrylic paints, both have qualities that can shine. Here, I used a thinned oil paint like a wash, running it into all the recesses and panel lines. Using odorless mineral spirits to thin the oil gives us much more control than with an acrylic wash. Properly thinned, it also dries far quicker than oils usually do, too. My RGG Glass Palette was ideal for this!
I used a burnt sienna color as it was a good ‘middle ground’ between red and brown. Too brown and it would look dirty. Too red and it would make the armor look more orange. With a loaded brush I dotted the wash into corners and recesses, and the capillary action did the rest! Minimal fuss and no clean up afterwards. I also used a little on the exposed metal parts and the red decorative parts, too. Just ensure you don’t use your acrylic brush for your oil paints, and vice-versa.
FINISHING DETAILS
As always, once you have added shadows and recess shades, it is important to also highlight. For this yellow, highlighting would be minimal. I used the side of my 00 brush to edge highlight the leading edges and extreme trims with pale yellow. For example the top of the helmet, gorget, and kneepad. The black was trimmed with a pale blue-gray, and the red with a hot orange. The dark steel I gave a spot highlight of silver, as this offered a really nice contrasting shine, I feel. The leather on his back was given a tan highlight to look worn at the edges. Finally, I gave the eye lenses a dot of white toward the back end, to suggest reflectivity.

As always, once you have added shadows and recess shades, it is important to also highlight.
James
PAINTING YELLOW MINIATURES : COMPLETED PIECE!

And there you have it! The proud Son of Dorn, ready to do battle on the tabletop. Hopefully after this ‘how to’ you can see yellow does not have to be daunting, even when army painting. The next steps here would be some proper basing across the whole squad, as well as applying transfers. Or if you are feeling bold, you could freehand some squad markings! As a siegecraft expert, this Fist could benefit from some chipping and weathering, but it depends on your personal preference and how ‘clean’ you like your marines. – James.
James is using the following RedgrassGames Painting tools
Wet palettes, brushes...